Apache Cordova App With Third Party Plugins
javascripttutorialmobileMobile Hybrid App using Apache Cordova with Web Browser, Calendar, and Navigation Plugins #
In this Blog post I'm going to cover how to build a simple Apache Cordova application that utilizes AngularJS, Bootstrap, and some third party plugins. I'll be using Visual Studio 2015 Community Edition with the TACO (Tools for Apache Cordova) features installed. To keep things really simple I'll just use an empty Template. For this particular app Ionic will not be necessary. I also have a GitHub repo available here with all the code.
Getting Started #

This template will give us most of what we need to get started. I assume most readers will be familiar with Bower by now. I'll be using it to pull in some of the important client-side dependencies. Bootstrap, AngularJS, and NgRoute. We will not be able to use the bower_components folder for an Apache Cordova project so we'll create a .bowerrc file. Add the following code into it:
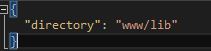
This will place our dependencies in the www folder under Lib so they can be added to our project and compiled with the rest of the code.
Next we need to add the actual dependencies to the bower.json file.
{
    "name": "EventApp",
    "dependencies": {
    "bootstrap": "~3.3.6",
    "jquery": "~2.2.4",
    "angular": "~1.5.6",
    "angular-route": "~1.5.6",
    "font-awesome": "~4.6.3"
  }
}
Your versions may differ*
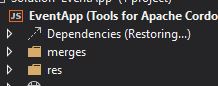
After you save the file you'll notice the Dependencies Restoring and then you'll have a www/lib folder with everything we need.
We need to add all the necessary JavaScript above the closing tag and CSS files above the closing tag of the Index.html.
<!-- Style Sheets -->
<link href="lib/bootstrap/dist/css/bootstrap.min.css" rel="stylesheet">
<link href="lib/font-awesome/css/font-awesome.min.css" rel="stylesheet">
<link href="css/app.css" rel="stylesheet">
<!-- Dependencies -->
<script src="lib/jquery/dist/jquery.min.js"></script>
<script src="lib/angular/angular.min.js"></script>
<script src="lib/angular-route/angular-route.min.js"></script>
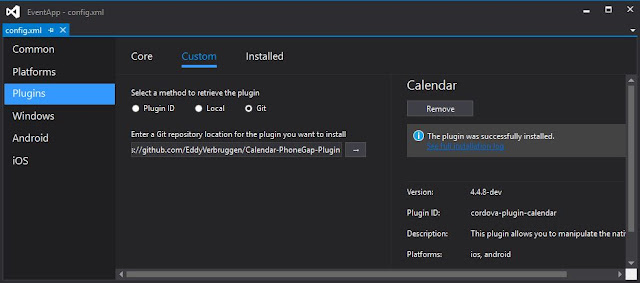
<script src="lib/bootstrap/dist/js/bootstrap.min.js"></script>We also need to include our Plugins. We'll be using the InAppBrowser plugin provided in the Core plugins and we'll also be adding two third party plugins via Git. To add the plugins navigate to the config.xml file here:
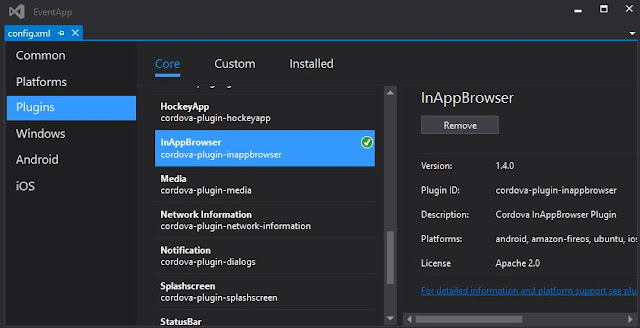
When you open the config file you will see a nice little GUI instead of just the xml unless you right click and view code. Select Plugins -> Core -> Search For InAppBrowser -> Select it -> Click Add
You will then see the following snippet:
Do the same for the Notification plugin. We will use it later on.
The next two Plugins we will be adding are Custom ones. Select Custom -> Git -> Paste In
https://github.com/EddyVerbruggen/Calendar-PhoneGap-Plugin
This will pull in information for the Calendar plugin in the right Pane. Select Add. The Calendar plugin should now be added.
Follow the same steps as above for the Launch Navigator plugin from here https://github.com/dpa99c/phonegap-launch-navigator.git
Now we have everything we need to start building the application!
Building the App #
The first thing we need to do is define our app structure. Inside the Scripts folder add a new sub folder called app. Inside the app folder add the following folders and files (you can skip the services folder it will not be used in this demo):
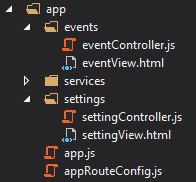
After your structure mirrors the above we'll need to add our files to the Index.html.
<!-- AngularJS Files -->
      <script src="scripts/app/app.js"></script>
      <script src="scripts/app/appRouteConfig.js"></script>
      <script src="scripts/app/events/eventController.js"></script>
      <script src="scripts/app/settings/settingController.js"></script>
Now that those are added it's time to start filling in the code. We'll start with the app.js file:
(function () {
    'use strict';

    angular.module('app', [
        //angular modules
        'ngRoute',
        //third party
        //custom
    ]);

})();
We'll also need to configure our Routes using NgRoute. We'll do that in the appRouteConfig.js file:
(function () {
    'use strict';

    angular
        .module('app')
        .config(appConfig);

    appConfig.$inject = ['$routeProvider'];

    function appConfig($routeProvider) {
        $routeProvider.when('/', {
            controller: 'eventController',
            controllerAs: 'vm',
            templateUrl: 'scripts/app/events/eventView.html'
        });

        $routeProvider.when('/settings', {
            controller: 'settingController',
            controllerAs: 'vm',
            templateUrl: 'scripts/app/settings/settingView.html'
        });

        $routeProvider.otherwise({ redirectTo: '/' });
    }

})();
I'll be using the AngularJS controllerAs syntax for this demonstration. If you prefer to write Angular a different way feel free to do so. Just follow along with what the code is doing and write it your own way.
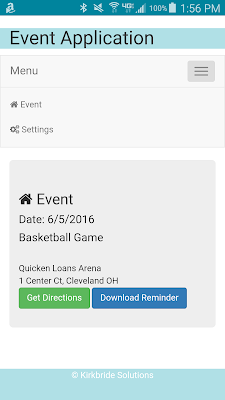
Next I've had to make some tweaks to the Index.html to accommodate using the InAppBrowser functionality in-line (not ideal but easy to demonstrate) and I've also setup a bootstrap style template to create a menu and simple layout for the app. You can replace the Index.html file with the following code if you wish:
https://github.com/JakeLegendXIII/EventApp_Repo/blob/master/EventApp/www/index.html
Now with that all in place all we have to do is start on the controllers and views. I'll start with some simple code, and we'll add in the Navigation and Calendar functionality in just a little bit.
Simple eventController.js
(function () {
    'use strict';

    angular
        .module('app')
        .controller('eventController', eventController);

    function eventController() {
        var vm = this;

        vm.name = 'Basketball Game';
        vm.location = 'Quicken Loans Arena';
        vm.address = '1 Center Ct';
        vm.city = 'Cleveland';
        vm.state = 'OH';
        vm.zip = '44115'
        vm.date = '6/5/2016'
    }

})();
Right now we're just binding some values for the event to the view from the controller. Normally we would be using our dataService to bring in this data, but I'm going to keep this demo pretty simple for now. You can put in any relevant location data on your own. Since I'm from the Cleveland area I chose Quick Loans Arena where the Cleveland Cavaliers play.
Simple eventView.html
<div>
  <div class="jumbotron">
    <h3>
      <i class="fa fa-home"></i> Event</h3>
    <h4>
      Date:  {{ vm.date }}
    </h4>
    <h4>
       {{ vm.name }}
    </h4>
       {{ vm.location }}

     {{ vm.address }}, {{ vm.city }} {{ vm.state }} {{ vm.zipCode }}
  </div>
</div>
We'll come back to this View and Controller to integrate the Calendar and Navigation functionality. We'll move onto the finished settingController and settingView next.
(function () {
    'use strict';

    angular
        .module('app')
        .controller('settingController', settingController);

    function settingController() {
        var vm = this;

        vm.buttonText = 'Click to learn more about TACO!';
    }

})();
Here is the view:
<div>
<div class="jumbotron">
<h3>
<i class="fa fa-gears"></i> Settings</h3>
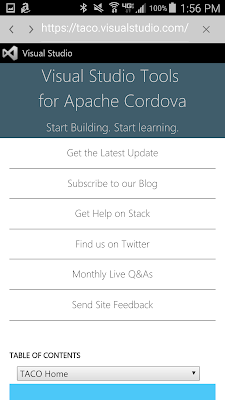
<a href="https://taco.visualstudio.com/" onclick="window.open('https://taco.visualstudio.com/',
'_blank', 'location=yes'); return false;" target="_blank">
<button class="btn btn-warning btn-lg"></button>
</a>
</div>
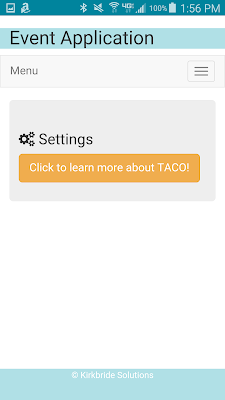
</div>The Settings screen is very simple. There is a button you can click that will open a website in the mobile browser. The way I have the button setup allows you to hit the back button in the browser and return to the app.
I am running the Application on a physical Android Test device. You will not be able to test the next couple of features unless you are using a physical test device or IOS emulator. I will not be showing the app running in IOS, but the code is written in a way that it will also work with IOS.
Now I'm going to cheat to get the Navigation and Calendar plugins working. I'd like to challenge you to build an AngularJS factory to get the Event data from and to use proper Ng-Click events after you see these plugins working. Below I will be using global variables inside the eventController to demonstrate how to use the plugins. If I have the time I will come back and rewrite the rest of the demo the proper way, but this will work for now.
Here is the new updated eventController.js
(function () {
'use strict';
var place = ''
var startDate;
var endDate;
var title;
var location;
angular
.module('app')
.controller('eventController', eventController);
function eventController() {
var vm = this;
vm.name = 'Basketball Game';
vm.location = 'Quicken Loans Arena';
vm.address = '1 Center Ct';
vm.city = 'Cleveland';
vm.state = 'OH';
vm.zip = '44115'
vm.date = '6/5/2016'
vm.time = '18:00:00';
vm.endTime = '20:00:00';
place = vm.address + ' ' + vm.city + ', ' + vm.state;
title = 'Event ' + vm.name;
location = vm.location;
var sd = vm.date + ' ' + vm.time;
var ed = vm.date + ' ' + vm.endTime;
startDate = new Date(sd);
endDate = new Date(ed);
document.getElementById('getdirections').addEventListener('click', getDirections);
document.getElementById('downloadreminder').addEventListener('click', downloadReminderPrompt);
}
function getDirections() {
//navigator.notification.alert('Directions!');
launchnavigator.isAppAvailable(launchnavigator.APP.GOOGLE_MAPS, function (isAvailable) {
var app;
if (isAvailable) {
app = launchnavigator.APP.GOOGLE_MAPS;
} else {
console.warn('Google Maps not available - falling back to user selection');
app = launchnavigator.APP.USER_SELECT;
}
launchnavigator.navigate(place, {
app: app
});
});
}
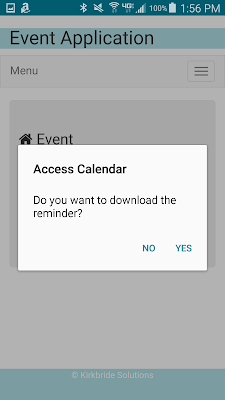
function downloadReminderPrompt() {
navigator.notification.confirm('Do you want to download the reminder?',
downloadReminder, 'Access Calendar', 'Yes, No');
}
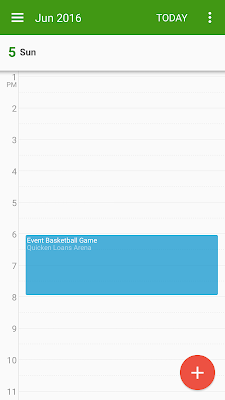
function downloadReminder(buttonIndex) {
if (buttonIndex === 1) {
try {
window.plugins.calendar.createEvent(title, location, "", startDate, endDate);
//Tell user
navigator.notification.alert('Reminder is downloaded!');
}
catch (err) {
navigator.notification.alert('An Error occurred. Unable to download reminder for this device.');
}
}
}
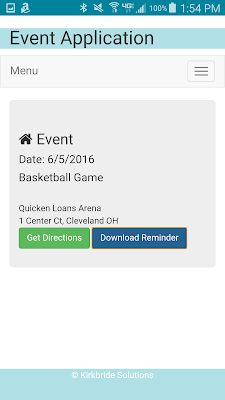
})();Here is the view:
<div>
<div class="jumbotron">
<h3>
<i class="fa fa-home"></i> Event
</h3>
<h4>
Date: {{ vm.date }}
</h4>
<h4>
{{ vm.name }}
</h4>
{{ vm.location }}
{{ vm.address }}, {{ vm.city }} {{ vm.state }} {{ vm.zipCode }}
<button class="btn btn-success" id="getdirections" type="button"> Get Directions</button>
<button class="btn btn-primary" id="downloadreminder" type="button"> Download Reminder </button>
</div>
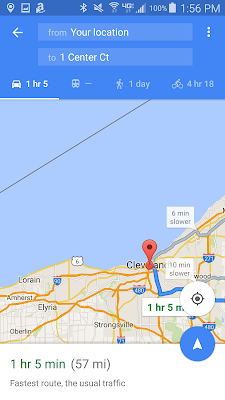
</div>As you can see I am cheating by using event listeners in the controller to call functions. We use the notifications plugin to alert the user that we will be adding the event to their Calendar. If they okay this we then add the event to the calendar. If Google_Maps is not found on the device the navigator plugin searches for any other applicable navigation apps and allows the user to choose which one they would like to use. The app is then provided the location that was provided for the event.
Here are some screenshots of this functionality working:
So this is a basic application that uses some AngularJS SPA functionality with Bootstrap styling and third party plugins.
You can check out other documentation on these plugins by using the GitHub links posted for the Repo's above. Additionally if you are having trouble getting an Android test device configured you may want to check out these:
http://stackoverflow.com/questions/34089085/deploying-to-android-device-not-found-in-visual-studio
If you want to setup your Apache Cordova in Visual Studio to remote deploy to your Mac you can go here:
https://taco.visualstudio.com/en-us/docs/ios-guide/#first-install-a-few-things-onto-your-mac